As a follow up to my Step by Step: How to Order a CMSR at Nara blog post, here are the directions that I learned on how to navigate the websites and properly order a Pension File at the National Archives.
There are two different ways to go about this depending on if you know the soldier’s unit and company or not:
- Fold3: If you want to search by name or unit and company.
- Ancestry: If you want to search by name only.
Ultimately, you will likely want to check both places as the index cards are from TWO different creations and contain different information. For example, the ones on Ancestry include updated numbers (C or XC) that you will need to put on your pull slip.
It can be beneficial for many reasons to search for a pension by a unit and company rather than by a person’s name. For example, the soldier may have had a common name, used multiple spellings, or changed their name.
THESE ARE THE DIRECTIONS FOR SEARCHING BY A UNIT AND COMPANY. You can search for a soldier by name, too. Also, there are many ways to get to the same information, this is just the way that works best for me.
Step 1: Sign in at Fold3.com.
- I do not know if you need to be a member to access the material, but the “Search & Browse” menu doesn’t appear at the top when I am not signed in, so you may need a membership (to go the same route that I am demonstrating).
Step 2: Click on Search & Browse in the top menu.
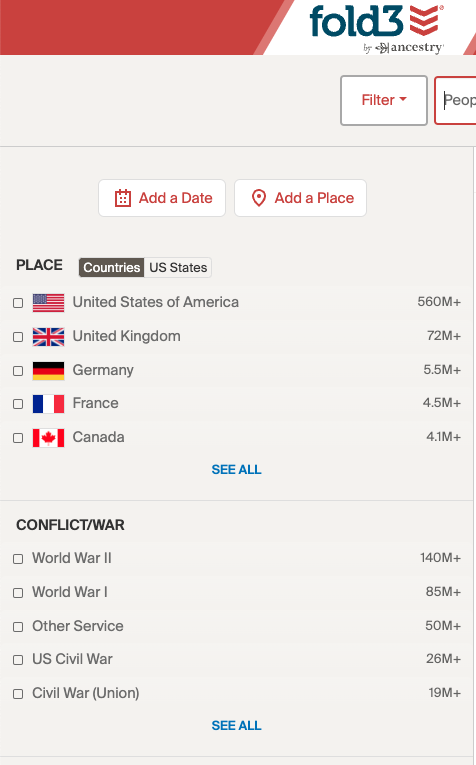
Step 3: Narrow down the Conflict/War on the left menu pane.
- The example that I am going to use is from the Civil War, so I am going to select Civil War (Union).
Step 4: Toggle from Search to Browse in the upper right corner of the page.


Step 5: Scroll down to the Publication Type found in the filters on the left and Pensions.
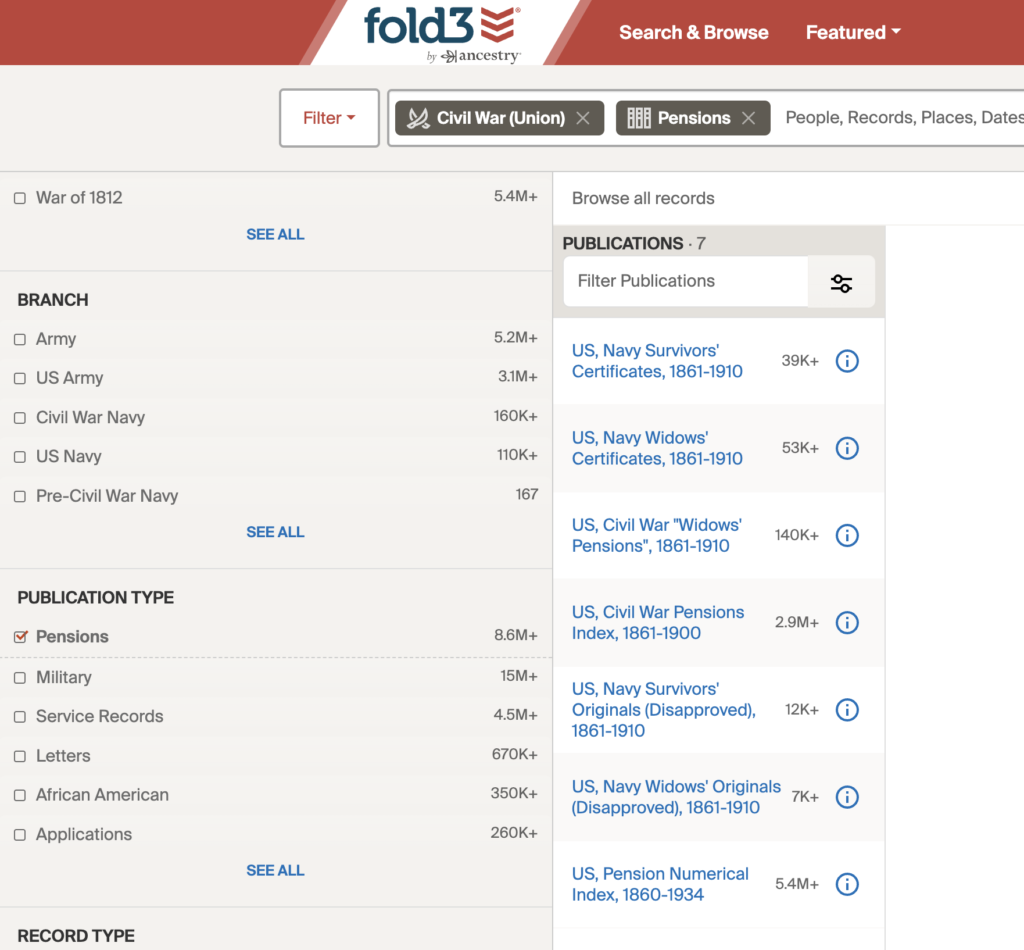
Step 6: For this example, I want to look for a soldier’s pension, so I am going to select the publication “US, Civil War Pensions Index, 1861-1900.”
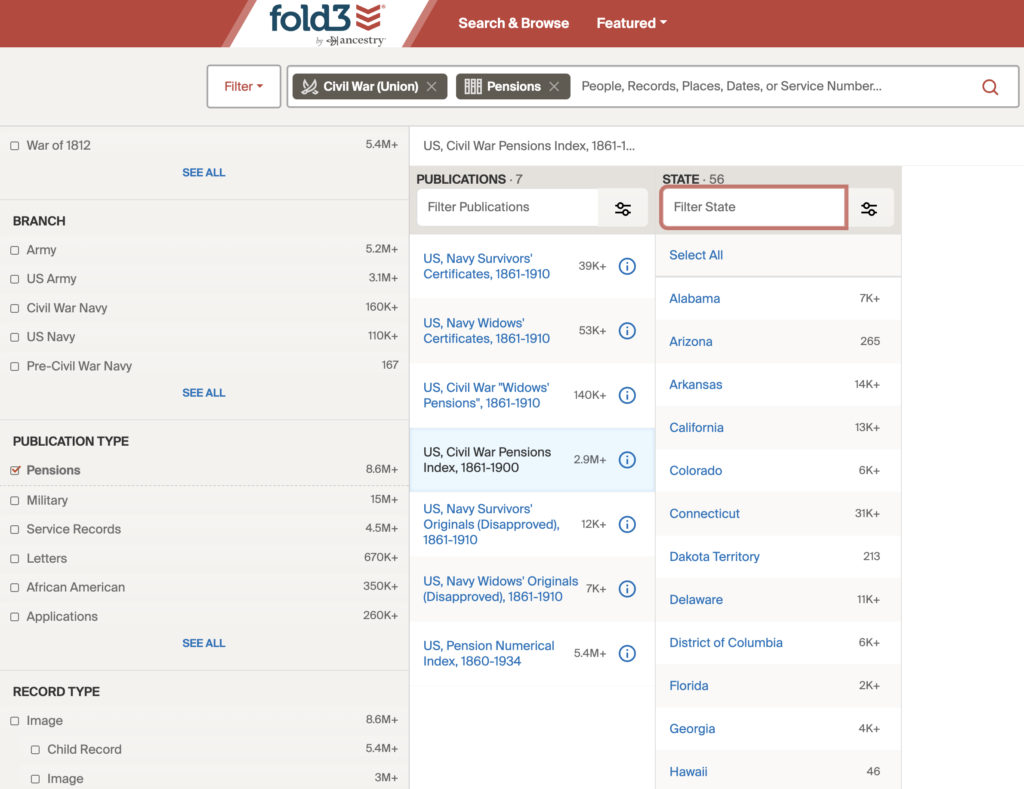
Step 7: Filter down to the state.

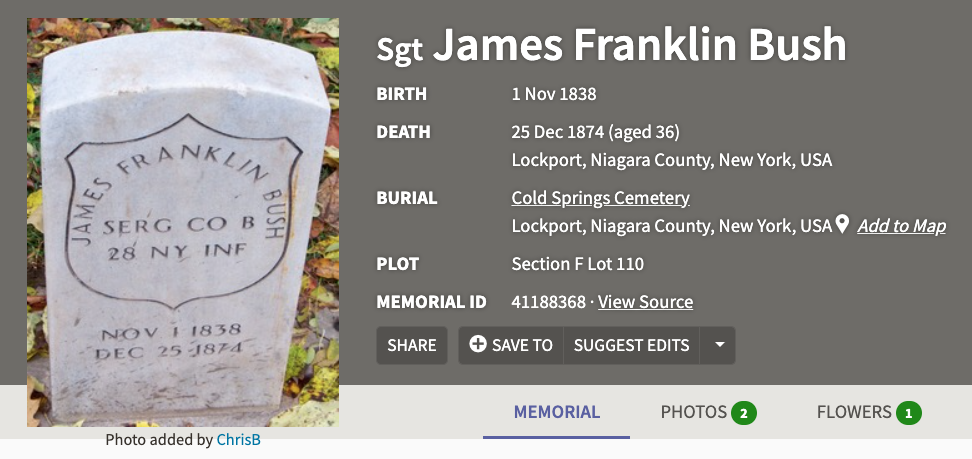
Step 8: Filter down the Arm of Service. In this case, I am going to use James Franklin Bush as it shows his unit and company on his headstone. Therefore, I am going to select Infantry.
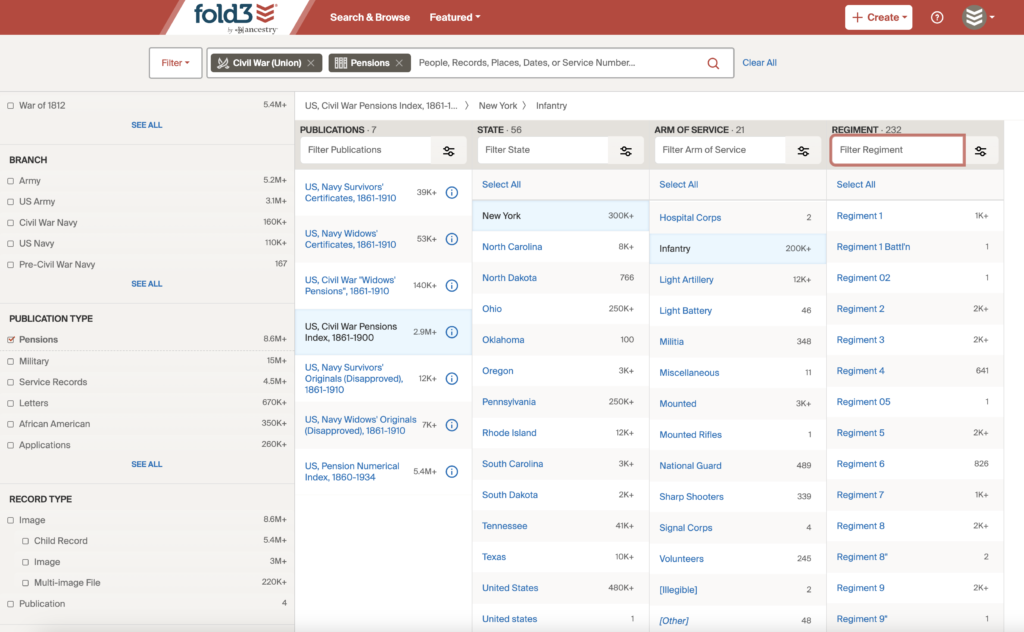
Step 9: Filter the Regiment. In this case, James Franklin Bush served with Regiment 28.
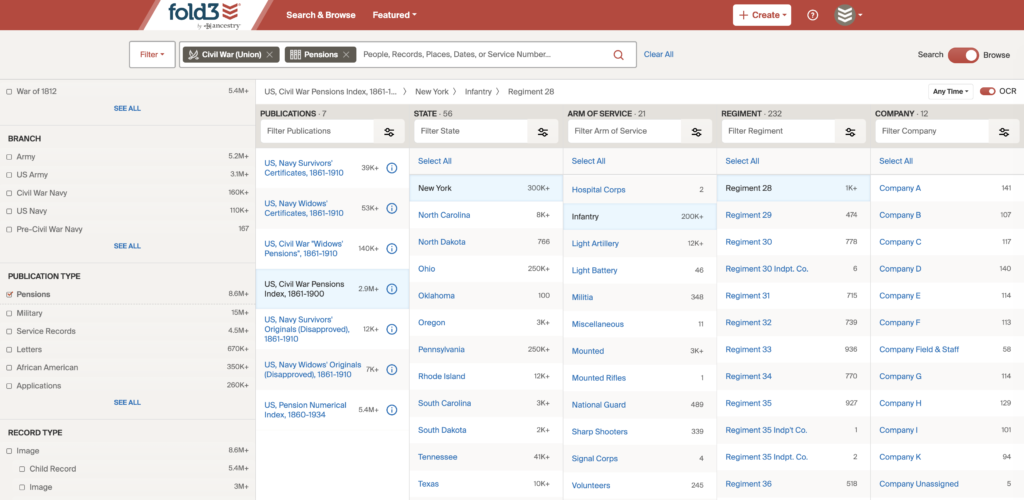
Step 10: Filter the Company. In this case, James Franklin Bush served with Company B.
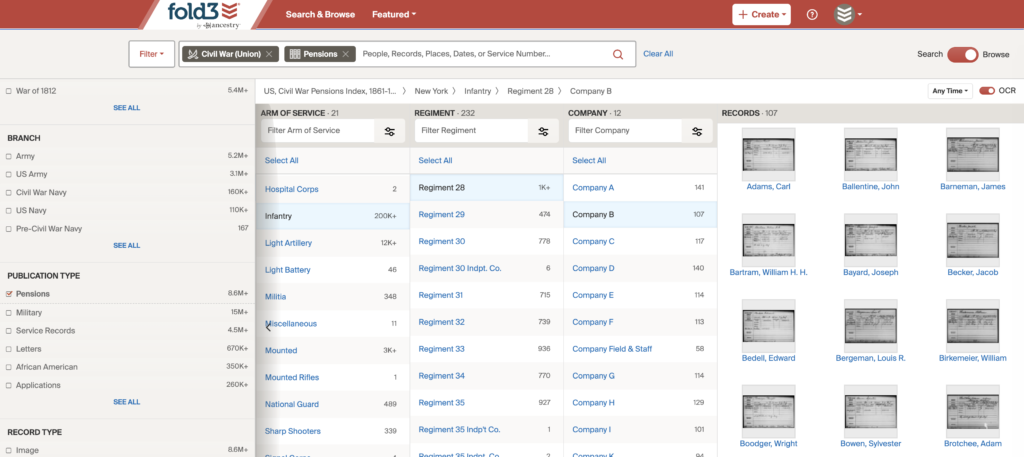
Step 11: Scroll through the names alphabetically until you find the soldier you were looking for and click on them. Now you have found the pension index card.
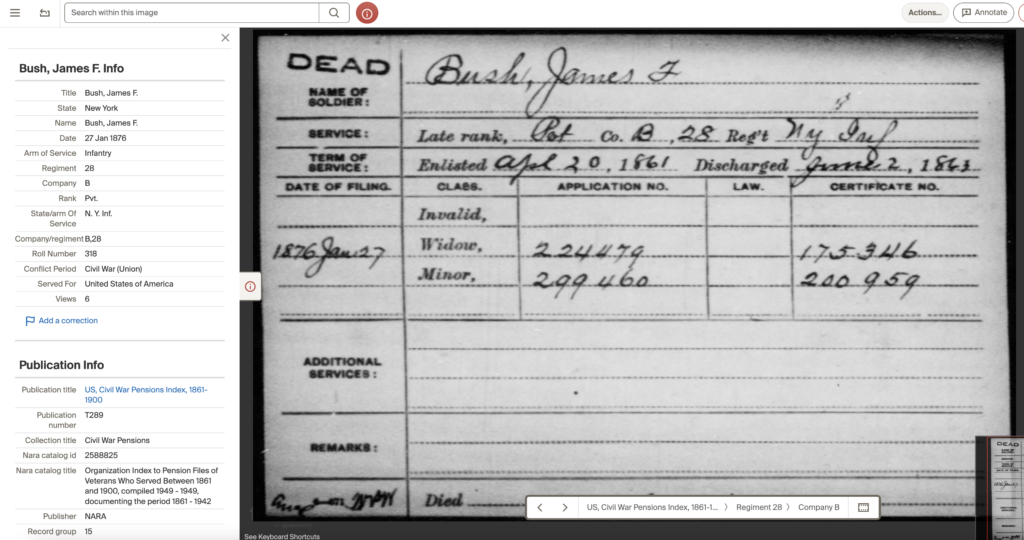
Now I have learned that James F. Bush did not apply for an Invalid Pension before he died, but that his Widow and Child/Children did.
I don’t want to stop there, though. Ancestry.com’s index cards are a different set and may have more information, better legibility, and/or updated numbers needed for ordering the pension file.
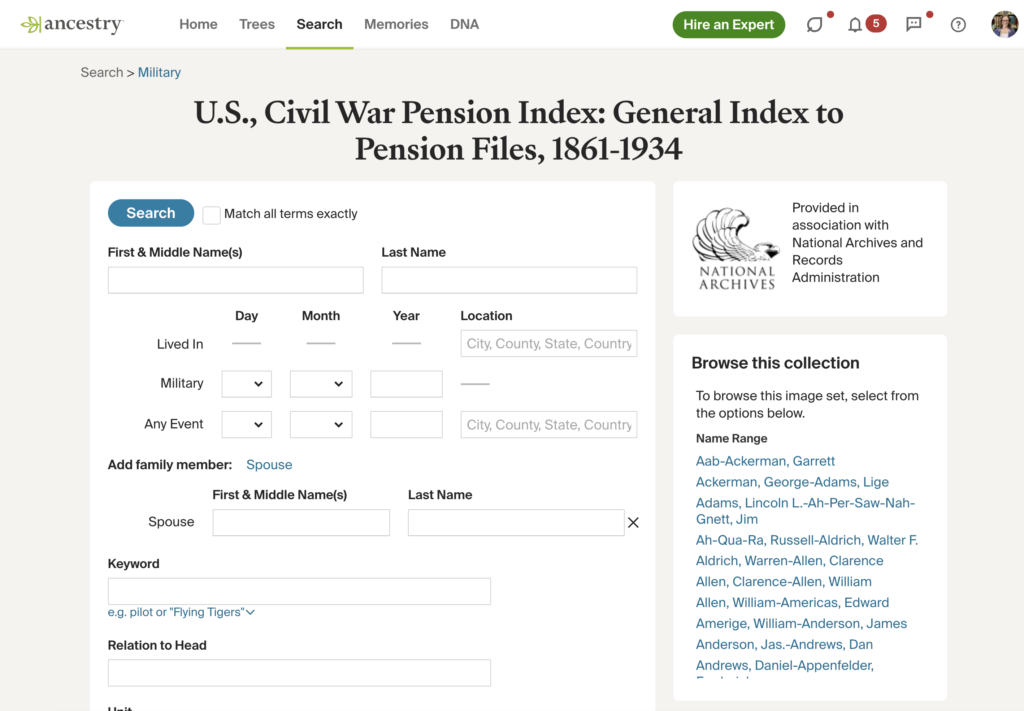
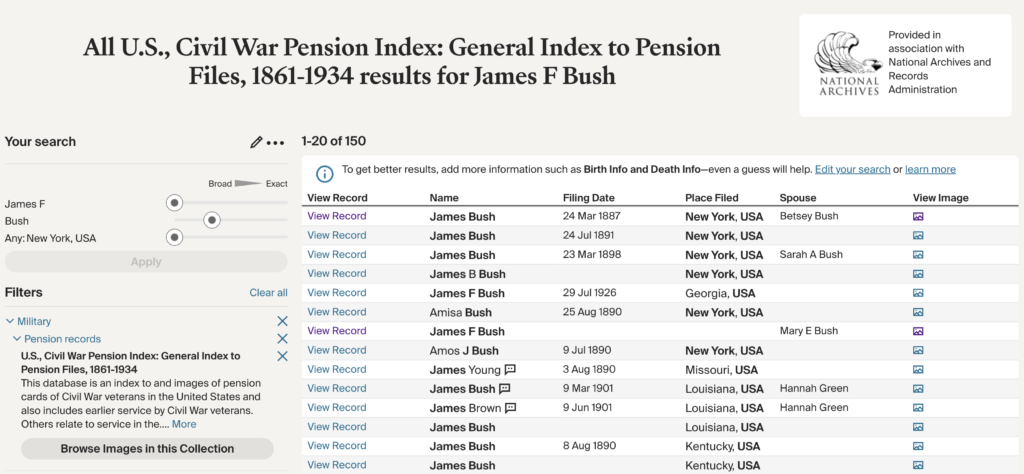
Step 12: Go to Ancestry’s collection: U.S., Civil War Pension Index: General Index to Pension Files, 1861-1934.
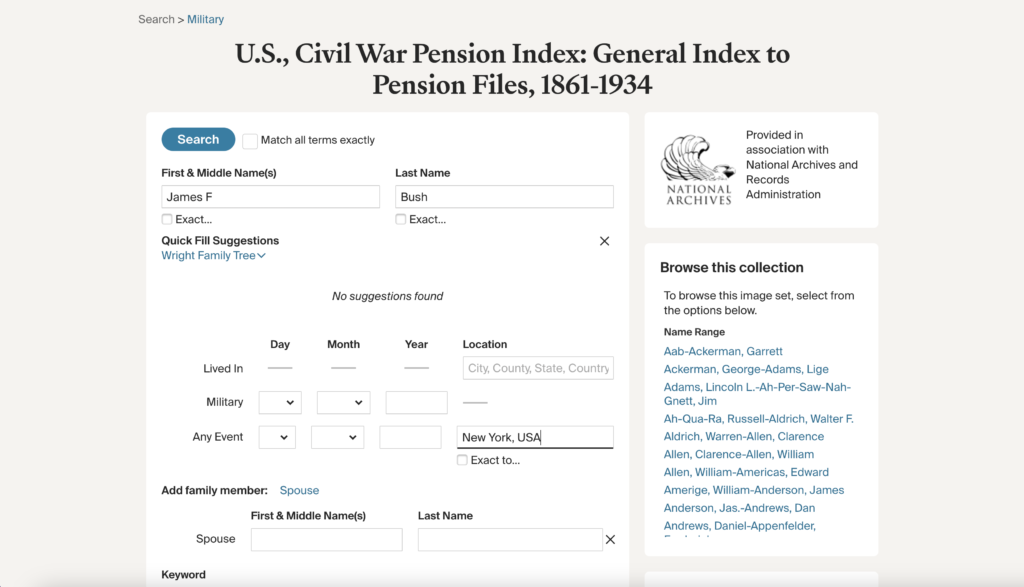
Step 13: Fill in the search fields. In this case, I added “James F Bush” into the name fields and added New York to the Any Event location field. I played with it a few different ways, but I often got back 150 search results.
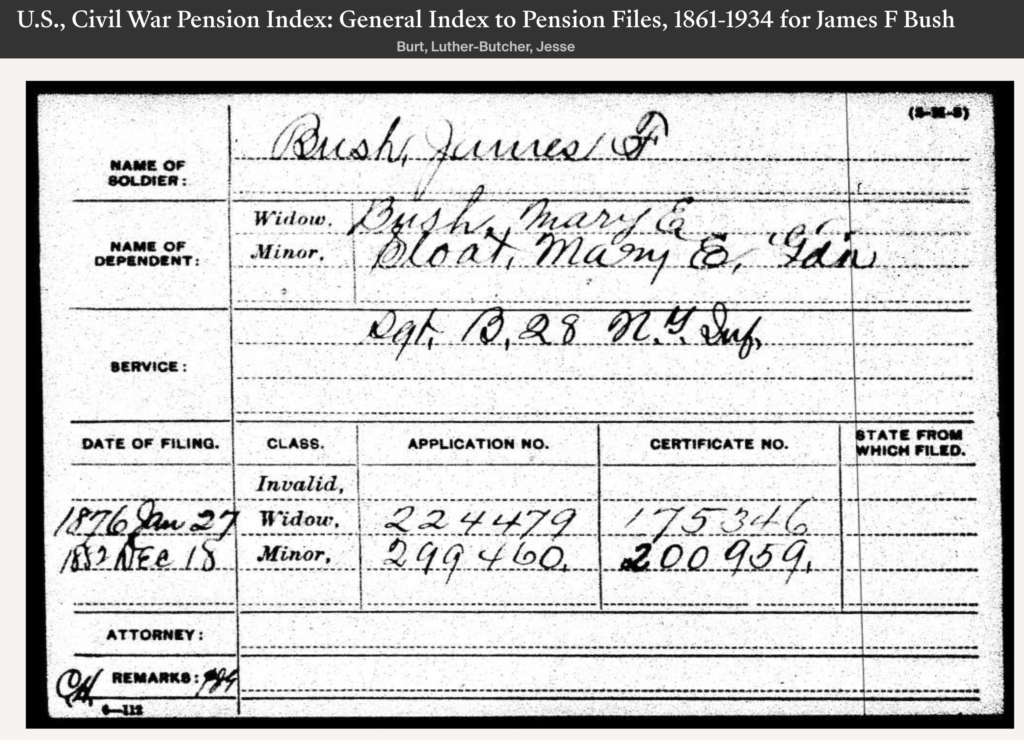
Step 14: View the Image of the Index Card that you think is the one you are searching for.
There were a few to click through not knowing which one was the one that I was looking for. Luckily, James’ wife, Mary Elizabeth Kromer Sloat, was listed on his Find a Grave memorial so I could take an educated guess and select the search result with “James F Bush” with a spouse named “Mary E Bush.”
And there it is! The regiment and company match the tombstone and the numbers match the index card found at Fold3. In this case, there were no additional numbers on the Ancestry index card that I would need to order the pension file.
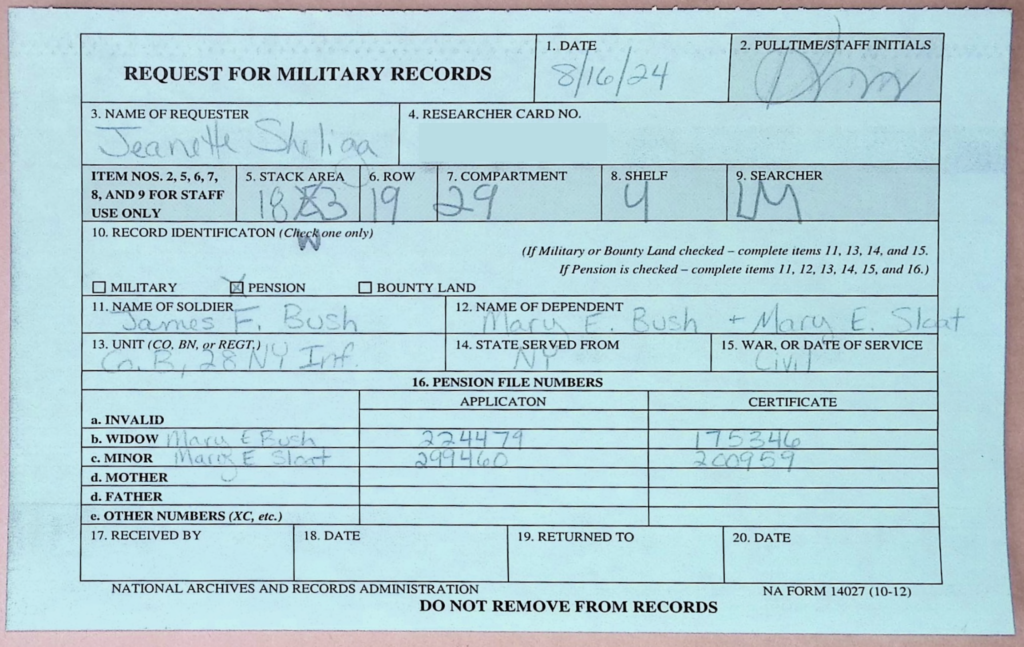
Step 15: Complete your pull request.
- Check the box for Pension.
- Put the name of the soldier exactly as it is on the Index Card.
- Name the Dependents.
- Put the unit exactly as it is on the Index Card.
- List the state served from.
- Name the war.